Introduction: Why Local Development is Your Secret Weapon
Welcome to the first step toward becoming a WordPress developer!
If you want to test new themes, practice your coding skills (like C# or SQL), or safely follow tutorials (like our Custom Post Type guide!), you need a Local Development Environment (LDE).
LDEs are fast, free, and safe “sandbox” versions of a web server right on your computer. We’re using WampServer (WAMP) because it’s one of the simplest ways to get started on Windows.
What you will build: A fully functional WordPress website accessible only to you at an address like http://localhost/my-first-site.
Prerequisites:
- A Windows PC.
- The WampServer software (which we will download).
- The latest WordPress zip file.
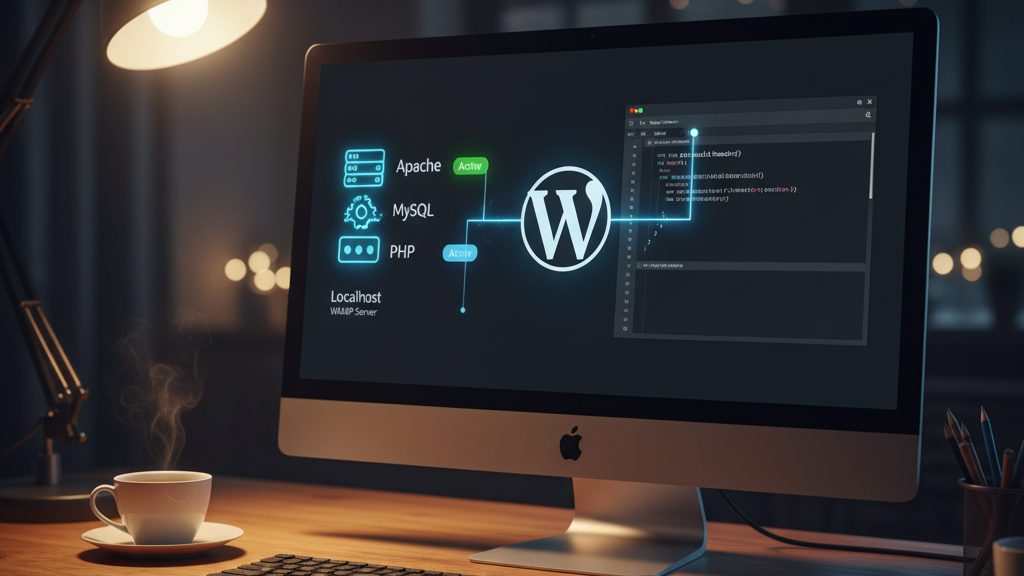
Phase 1: Setting Up WAMP (Your Local Server)
The WampServer software acts as your virtual web host, providing the necessary Apache, MySQL, and PHP components.
Step 1: Download and Install WampServer
- Download Dependencies: Navigate to the official WampServer website. Crucially, WAMP requires Visual C++ Redistributable packages to run correctly. Download and install any requested packages before running the WAMP installer.
- Install WAMP: Run the WampServer setup file. Accept the license agreement and follow the prompts. It’s best practice to leave the installation directory as the default (usually
C:\wamp64). - Configure PHP Mail (The Skip): The installer will likely ask you to set up PHP email settings (SMTP). For local development, you can safely accept the defaults and click “Next” to complete the installation.
Step 2: Launch WAMP and Achieve the “Green Light”
- Find the WampServer icon in your start menu and launch it.
- Look for the WAMP icon in your system tray (bottom right, near the clock). The color indicates its status:
- Red Icon: WAMP is offline.
- Orange/Yellow Icon: WAMP is running, but only partially (e.g., only Apache is active).
- Green Icon: Success! All services (Apache, MySQL, and PHP) are running.
- If the icon is Red or Orange/Yellow, click it and select “Start all services.” Wait a few seconds for it to turn green.
- Test the Server: Click the green WAMP icon and select “Localhost.” A new page should open in your browser, confirming the WampServer environment is fully operational.
Phase 2: Creating the Database
Every WordPress site needs a blank MySQL database to store its content, users, and settings.
Step 3: Access phpMyAdmin
- Click the green WAMP icon in the system tray.
- Select “phpMyAdmin” from the menu. This opens the database administration tool in your browser.
- Log in using the default credentials:
- Username:
root - Password: (Leave this field blank)
- Username:
Step 4: Create the New Database
- In the phpMyAdmin interface, click the “Databases” tab at the top.
- Under “Create database,” enter a simple, memorable name. We recommend:
my_local_wp - Click the “Create” button.
Your blank database is now ready for WordPress to connect to.
Phase 3: Installing the WordPress Files
Now we place the WordPress files into WAMP’s folder structure, which is the server’s public directory.
Step 5: Locate the WAMP Web Root Folder
You need to find the folder where WAMP stores all your websites.
- Click the green WAMP icon.
- Select “www directory.”
This will open your file explorer to the WAMP web root folder, usually C:\wamp64\www\.
Step 6: Place the WordPress Files
- Create a new folder inside the
wwwdirectory. Name it after your site, for example:my-first-site. - Find the WordPress
.zipfile you downloaded from WordPress.org. - Unzip the contents of the WordPress folder and move everything (all the
wp-admin,wp-content, etc., folders) into your newmy-first-sitefolder.
Phase 4: Running the 5-Minute Setup
The server is running, the database is ready, and the files are in place. Time to connect them all!
Step 7: Launch the WordPress Installer
- Open your web browser.
- Navigate to your site’s local URL: http://localhost/my-first-site
- The WordPress setup screen should appear. Select your language and click “Continue.”
Step 8: Connect the Database
On the next screen, you will fill in the database details from Phase 2:
- Database Name:
my_local_wp(or whatever you named it) - Username:
root - Password: (Leave this field blank)
- Database Host:
localhost(Keep this default)
Click “Submit,” then click “Run the installation.”
Step 9: Final Site Details
- Choose a Site Title (e.g., “My Tech Practice Site”).
- Choose a unique Admin Username and a Strong Password.
- Click “Install WordPress.”
Congratulations! You have successfully installed WordPress on your local computer. You can now log in and start practicing your coding skills.
Design Synergy: Instant Iteration (By Zara)
Architect’s Tip: Using WAMP means you can test design changes at lightning speed. When working with design apps like Adobe or Blender, you often want to see how a new color palette or font looks instantly on a website. Because your local site is running directly on your computer, the feedback loop is immediate. This is the safest and fastest way to iterate on your visual design before going live!
Conclusion and Next Steps
You now have a safe, powerful environment for all your coding and design practice.
Your next logical step is to start coding!
→ Head over to our guide: ” How to Code WordPress Custom Post Types Without a Plugin” to learn how to add custom functionality to your new local site!