If you’ve read our previous article, “Artificial Intelligence in 3D Modeling: Transforming Art and Design”, you already know how AI is reshaping the world of 3D modeling.
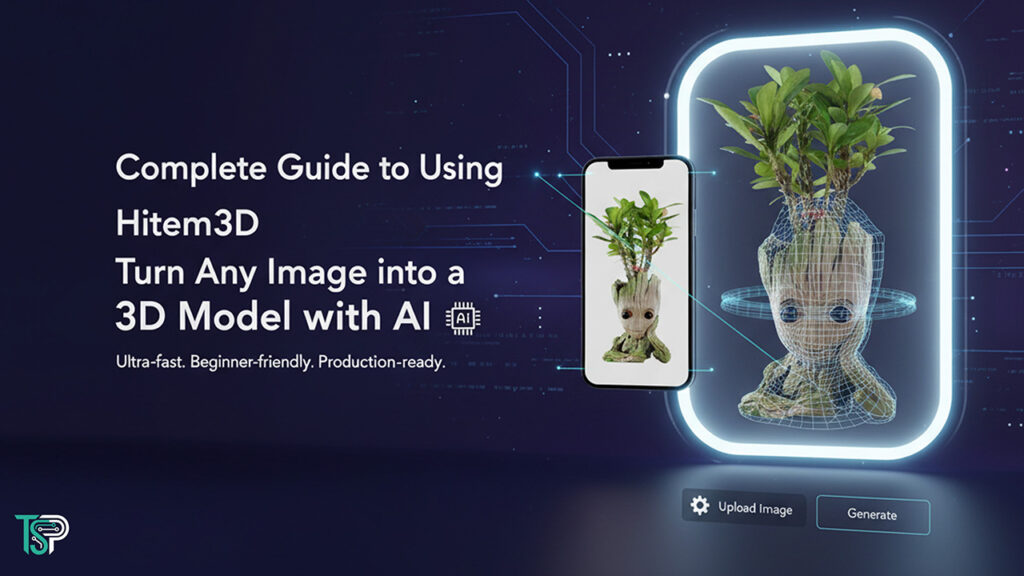
Today, we’re diving into one of the most exciting tools in this space: Hitem3D.
This platform allows you to upload a single image and get a fully generated 3D model – even with textures – in under three minutes!
In this article, we’ll walk you through the entire process: signing up, exploring the dashboard, selecting resolution, enabling textures, downloading your model, and managing credits.
At the end, we’ve included a tutorial video so you can see everything in action.
Getting Started with Hitem3D (Sign Up & Login)
- Go to the Hitem3D website.
- Click Sign Up and register using your email, Google, or GitHub account.
- Verify your activation email.
- Enter the Workspace – this is where all the magic happens.
🔑 Pro Tip: When you sign up, you get 100 free credits, which are more than enough to test out the features.
Exploring the Workspace
Hitem3D’s interface is clean and beginner-friendly. Here are the main sections you’ll use:
- Create: The main tool that converts your image into a 3D model.
- History: Your personal archive of generated models, complete with search and filtering options.
- Credits: Displays your credit balance and allows you to purchase more if needed.
Step-by-Step: Creating Your 3D Model
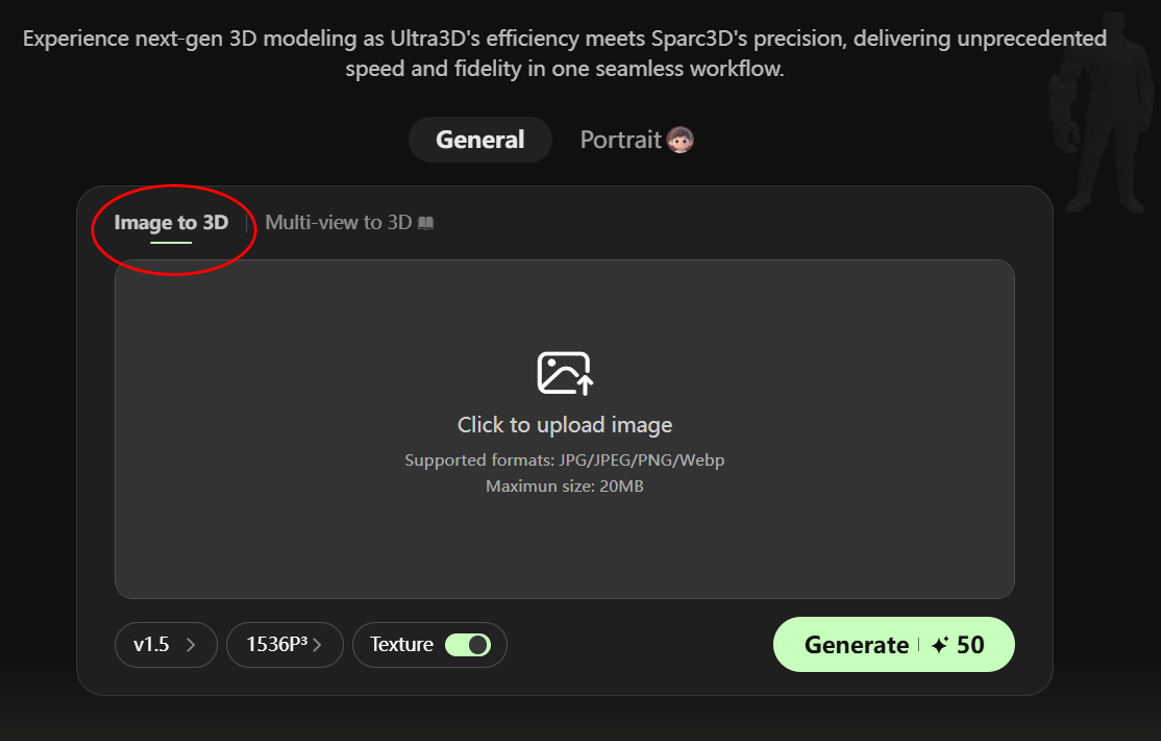
1. Select Image-to-3D Mode
In the Workspace, click on Image to 3D to open the creation panel.
2. Upload Your Image
Drag & drop your reference image or click the upload button.
📸 For best results:
- Use a clear front-facing image of the subject
- Keep the background simple and uncluttered
- Choose a high-resolution image for sharper output
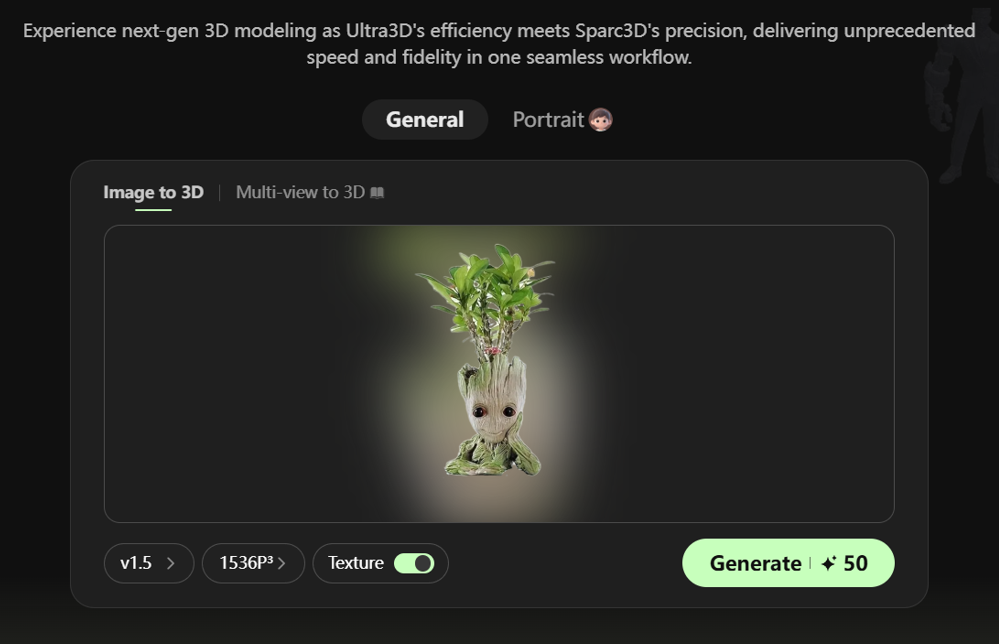
💡 Pro Tip: For the best results, we recommend using a clean, standardized front view of your object with no text or unnecessary elements in the image. This ensures maximum quality when transforming your 2D design into a 3D model
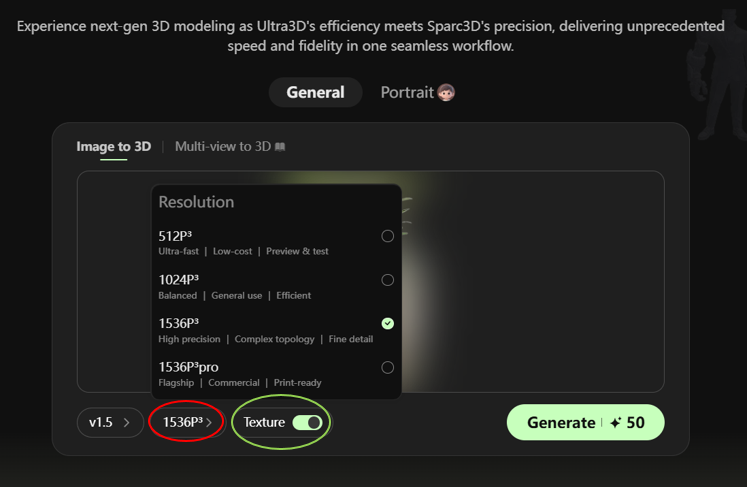
3. Choose Resolution & Texture Settings
Before hitting Generate, adjust your settings:
- Resolution:
- 1024³ → uses 10 credits (fast & lightweight)
- 1536³ → uses 40 credits (higher detail)
- Generate with Textures:
- 1024³ Geometry + Textures → 20 credits
- 1536³ Geometry + Textures → 50 credits
4. Generate the Model
Click Generate and wait a few seconds (usually under 150 seconds).
5. Preview & Regenerate
Check the generated model preview.
Not satisfied? You get 3 free regeneration attempts without losing credits. (Paid members get unlimited regenerations at no extra cost.)
6. Download Your Model
Click Download and choose the output format that suits your project:
- FBX → perfect for Unity/Unreal game engines
- OBJ,GLB,STL → ideal for 3D printing or CAD work
Advanced Features in Hitem3D
- 🎨 Advanced Texture Mapping: Create and edit textures directly within the tool.
- ⚡ Real-Time Rendering Preview: See updates instantly before downloading.
- 🛠 Model Optimization: Reduce polygon count while preserving details.
Tips for Best Results
- Use images with good lighting and a clean background.
- Choose 1536³ resolution for projects requiring high precision.
- If you plan to create your own textures later, disable texture generation to save credits.
Pros & Cons of Hitem3D
Pros
✅ Ultra-fast generation (under 3 minutes)
✅ Beginner-friendly interface
✅ Models are game-ready, printable, or animation-compatible
✅ 3 free regeneration chances per model
Cons
❌ Requires a stable internet connection
❌ High-resolution models can consume credits quickly
❌ Limited control over professional-grade topology (retopology may be required for AAA projects)
Final Thoughts
Hitem3D is an amazing tool for anyone looking to create 3D models without the complexity of traditional modeling workflows.
From game developers and digital artists to 3D printing enthusiasts, it allows you to turn your ideas into production-ready assets quickly and easily.